Table of Contents
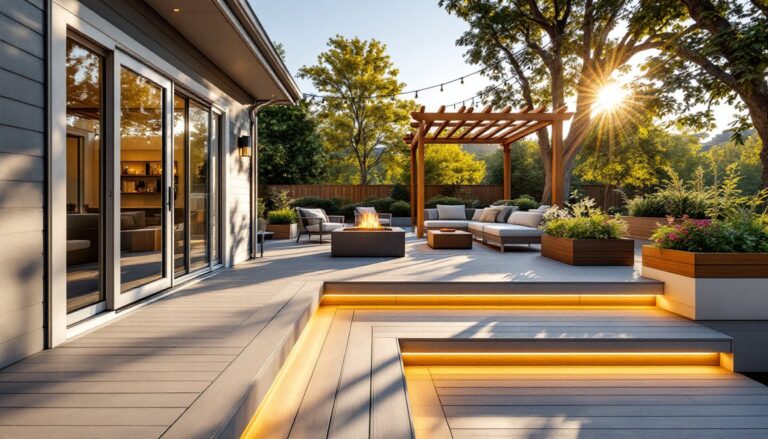
ToggleConcrete floors have shed their industrial reputation. What used to feel cold and utilitarian now rivals hardwood and tile for style and durability. Whether you’re finishing a basement, renovating a kitchen, or transforming a garage into a workshop, concrete offers flexibility that few other flooring options can match. In 2026, homeowners are discovering that concrete isn’t a compromise, it’s a choice. You can polish it to a mirror shine, stain it rich jewel tones, texture it for grip and character, or coat it with epoxy for dramatic flair. The material is forgiving to install, long-lasting, and costs less than many alternatives while delivering more personality than you might expect. Let’s walk through the concrete flooring ideas that are working right now.
Key Takeaways
- Concrete flooring ideas now include polished, stained, stamped, and epoxy options that rival hardwood and tile in style, durability, and cost-effectiveness.
- Polished concrete delivers a modern, minimalist look with easier maintenance than raw concrete, but matte finishes are safer for homes with kids or pets due to slip resistance.
- Stained concrete offers rich, customizable colors using acid or water-based stains; testing samples on inconspicuous areas first prevents color disappointment under different lighting.
- Textured, stamped, and control-joint scoring not only enhance visual appeal but also serve functional purposes like slip resistance and crack prevention in large spaces.
- Epoxy and resin coatings provide superior durability for high-traffic areas and resist stains and chemicals, with two-component systems lasting 5–10 years longer than single-component alternatives.
- Sealed concrete floors last 20+ years with proper maintenance, including regular sweeping, monthly damp-mopping, and resealing every 2–3 years, while avoiding acidic cleaners and road salt damage.
Polished Concrete: Sleek Finishes for Contemporary Homes
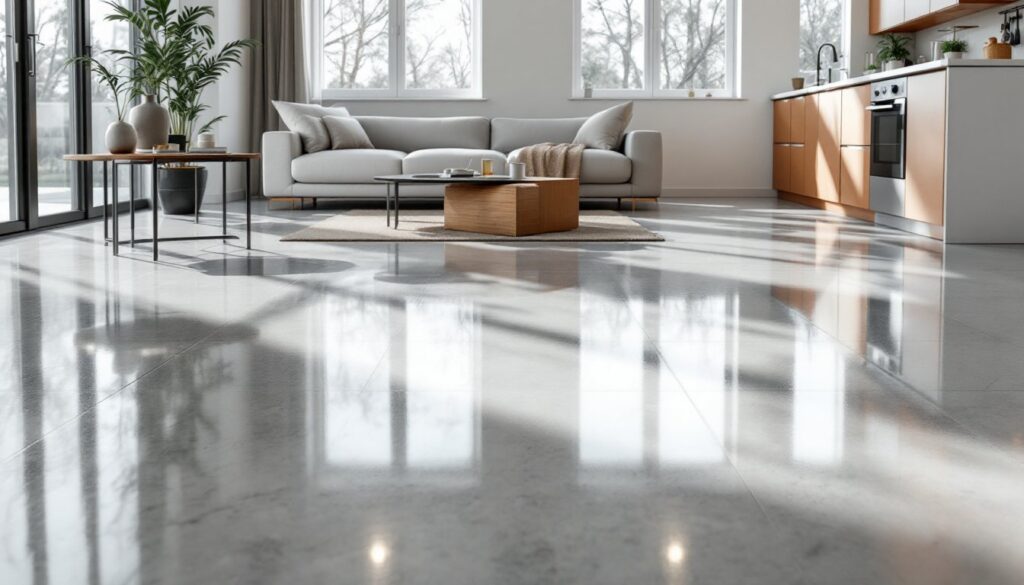
Polished concrete delivers a minimalist, modern look that works in open-concept living spaces, commercial kitchens, and high-traffic areas. The process involves grinding the surface with progressively finer diamond abrasives until it reaches a glossy or matte finish. A four-step polishing sequence is standard: grinding at 80-120 grit, 200-400 grit, 800-1200 grit, and final densifying. The higher the grit, the more light reflection you get.
One big advantage: polished concrete is easier to clean than raw concrete. Dust doesn’t settle as deeply because the surface is sealed. Spills wipe up quickly, and you avoid the constant sweeping and sealing that unfinished slabs demand. Light reflects off the polished surface, making rooms feel larger, a genuine bonus in smaller spaces.
The catch is that polished concrete can be slippery underfoot, especially in socks. Add a slip-resistant sealer or consider matte finishes instead of high-gloss if you have kids, elderly family members, or pets. Matte polishes still look sophisticated but grip better. Expect to hire a pro for this job unless you’re renting grinding equipment and have experience: the machinery is expensive and technique-sensitive. Budget $2–$5 per square foot for professional polishing, depending on your region and the condition of the concrete.
Stained Concrete: Color and Customization Options
Staining gives concrete rich, varied color without hiding the surface texture. You have two main routes: acid stains and water-based stains. Acid stains chemically react with the concrete’s minerals, producing translucent, earthy tones, terracotta, slate gray, sage green. The finish looks organic and aged, with natural color variation that hides imperfections. Water-based stains offer more consistent color and a wider palette, including brights and pastels, though they don’t penetrate as deeply.
Staining works best on clean, sealed concrete. If your slab has never been treated, you may need light grinding first to open the pores. Apply stain with a brush, sprayer, or mop, following the manufacturer’s drying times, usually 24 to 72 hours. Once dry, seal with a polyurethane or acrylic topcoat to protect color and add durability.
When choosing stain colors, order samples and test them on an inconspicuous area first. Concrete’s color changes dramatically depending on lighting and moisture. A gray that looks cool in daylight can shift warm under evening lamps. Professionals who dye concrete floors often recommend starting with a monochromatic scheme if you’re new to color, then building complexity with accent borders or ombre effects as you gain confidence.
Textured and Stamped Concrete: Pattern Ideas
Stamped concrete mimics the look of tile, brick, stone, or wood grain without the cost or seams. Patterns are pressed into concrete while it’s still plastic, soft but setting, using rubber or polyurethane stamps. The result is repeating texture that catches light and adds visual interest.
Common patterns include slate tile, ashlar stone, herringbone brick, and wood plank designs. Coordinating colors with stain before stamping creates depth: darker grout lines between lighter “tiles” look authentic. Stamped concrete works well in entryways, patios, and garage floors where durability matters more than a seamless appearance.
Simple texturing, broom finish or light diamond tread, is a DIY-friendly option. A broom finish creates straight lines across the surface that improve slip resistance without mimicking a specific pattern. Drag a stiff-bristled push broom across freshly set concrete. It’s cheap, effective, and requires only basic tools. Stamped concrete, but, demands precision timing and often a second person: hire a pro unless you’ve practiced on a test patch. Expect $8–$15 per square foot for professional stamping, including color and sealing.
Epoxy and Resin Coatings: Durability Meets Design
Epoxy and polyurethane resin coatings transform concrete into a seamless, hard-wearing surface that resists stains, chemicals, and impact. They’re particularly popular in garages, workshops, and commercial kitchens where durability is non-negotiable. Epoxy sits atop the concrete, bonding mechanically and chemically for strength that outperforms simple sealers.
These coatings come in single-component (easier to apply, fewer fumes) and two-component (stronger, longer-lasting) systems. Two-component epoxy requires mixing resin and hardener in precise ratios and working quickly before it hardens. Application is critical: the concrete must be cleaned, degreased, and often lightly etched or ground to ensure adhesion. Moisture is the enemy, test the slab with a moisture meter before applying. High humidity or damp concrete causes epoxy to peel and fail.
Design options include solid colors, metallic finishes, and broadcast flake systems where colored chips are scattered into wet epoxy for a speckled, three-dimensional look. Gloss finishes are slippery: choose matte or add texture with aggregate. One-coat systems save time but offer less durability: two-coat systems, primer plus color coat, last 5–10 years in high-traffic areas. Budget $3–$8 per square foot for professional epoxy application.
Scoring and Separating Large Spaces
Concrete expands and contracts with temperature and humidity. Without relief joints, large slabs crack unpredictably. Control joints (grooves cut 1/8 to 1/4 inch deep) guide cracks to predetermined lines where they’re less visible. They should run perpendicular to the longest direction of the slab, typically spaced every 6 to 8 feet. Cut joints with a concrete saw and groover once the slab is firm but not fully cured, usually 12 to 24 hours after pouring. Saw-cut joints are cleaner and more durable than tooled ones.
For large spaces (basements, garages), consider decorative scoring patterns that double as visual dividers. Stagger rectangular sections of varying sizes for a modern aesthetic, or create a running pattern with parallel lines. Scoring is both functional and beautiful, so plan it as part of your design, not an afterthought.
Maintenance and Longevity Tips
Concrete floors outlast most flooring options when maintained properly. Raw, unfinished concrete is porous and absorbs stains and moisture, avoid leaving water pooling. Sealed or coated concrete shrugs off spills if you wipe them promptly. Sweep or vacuum regularly to prevent grit from scratching the surface.
For sealed polished or stained floors, damp-mop with a concrete-specific cleaner every month. Avoid acidic cleaners (vinegar, citrus) that etch the sealer. Reapply sealer every 2 to 3 years depending on foot traffic and sunlight exposure. Epoxy-coated floors need less frequent resealing but may scratch over time: touch up scuffs with epoxy repair kits.
In cold climates, use sand or kitty litter for traction instead of rock salt, which damages concrete. Road salt accelerates deterioration, so rinse floors regularly during winter. Freeze-thaw cycles can pit the surface if moisture penetrates: a quality sealer prevents this. With attentive care, a sealed concrete floor lasts 20+ years. Unfinished concrete typically needs replacement or major resurfacing after 10–15 years in high-traffic areas.
For renovation planning and cost estimates tailored to your region, home remodeling guides can help you budget accurately and find local contractors with concrete experience. Many factors, slab preparation, regional labor costs, and finish complexity, affect the final price.
Conclusion
Concrete flooring isn’t one-size-fits-all. You choose the finish that matches your home’s style and your lifestyle. Whether you’re after sleek polish, rich stain color, rugged texture, or high-gloss epoxy, concrete delivers durability at a reasonable price. The key is honest prep work, clean, level concrete with no moisture issues, and protecting your choice with the right sealer. Start small if you’re new to concrete finishes, consider getting samples and professional input from platforms like Houzz for design inspiration, and don’t skip maintenance. Done right, a concrete floor is an investment that pays back in longevity and style.