Table of Contents
ToggleA well-designed deck bar transforms your outdoor space from a simple landing into a genuine entertainment hub. Whether you’re hosting weekend gatherings or enjoying quiet evenings with family, a deck bar setup encourages people to linger, relax, and enjoy themselves. The good news? You don’t need a massive budget or contractor-level skills to pull it off. This guide walks you through seven practical deck bar ideas, from built-in counters to simple furniture arrangements, that suit different budgets, skill levels, and deck sizes. You’ll find options whether you’re starting from scratch or adding to an existing deck.
Key Takeaways
- A well-designed deck bar transforms outdoor spaces into genuine entertainment hubs without requiring a massive budget or professional contractor skills.
- Built-in bar counters (24–30 inches deep, 3–6 feet long) with pressure-treated framing and stainless steel shelving create the anchor for deck bar ideas, while requiring no permit in most areas if under 200 square feet.
- Portable bar carts paired with outdoor stools or Adirondack chairs offer flexible deck bar setups ideal for renters or those who like rearranging their space.
- A dedicated outdoor refrigerator ($800–$2,500) is the single best upgrade for any deck bar, though a beverage cooler ($50–$300) works as a budget-friendly alternative.
- Shade solutions like retractable awnings, pergolas, or cantilever umbrellas transform a seasonal deck bar into a year-round gathering spot by reducing glare and UV exposure.
- String lights, recessed LED task lighting, and warm-temperature accent lights (2700K or lower) create inviting nighttime ambiance while ensuring guest safety with GFCI-protected outlets.
- Smart seating layouts with 26–30 inches spacing between bar stools, conversational furniture clusters, and clear foot traffic flow maximize guest comfort and encourage mingling in both small and large deck spaces.
Built-In Bar Counter and Serving Station
A built-in bar counter is the anchor of any serious deck bar. It gives you dedicated counter space for drinks, snacks, and glassware while keeping the workflow organized. Start by planning the footprint: most home bar counters are 24–30 inches deep and 3–6 feet long, though you can adjust based on deck size.
For the frame, use pressure-treated 2×6 joists and 2×4 studs bolted directly to an existing deck post or to additional footings sunk below the frost line. This is non-negotiable if you want the structure to last, a wobbly counter gets worse with use. The top can be simple plywood with a water-resistant finish, or you can go fancier with composite decking material or concrete overlay. Most jurisdictions don’t require a permit for a small built-in counter under 200 square feet and less than 30 inches high, but check your local code.
Finish it with stainless steel or commercial-grade shelving underneath for glassware and bottles. Paint or stain everything with exterior-grade products rated for your climate. Plan a slight slope (1/8 inch per foot) for drainage if the counter sits where water collects.
Portable Bar Cart and Furniture Setup
Not everyone wants a permanent installation. A portable bar cart, whether store-bought or DIY, gives you flexibility without commitment. Look for carts with sturdy wheels and a weight capacity of at least 50 pounds. Stainless steel or powder-coated metal frames resist weather better than bare wood.
You can build a simple one using a pressure-treated frame, melamine shelves, and outdoor-rated casters. The basic formula: two side frames connected by shelves, roughly 24 inches wide by 36 inches tall by 16 inches deep. Use galvanized bolts and lag screws to ensure everything stays tight through vibration and seasonal movement.
Pair your cart with bistro-style seating or stools. Adirondack chairs work, but they eat deck space: if room is tight, go with compact outdoor bar stools (18–26 inch seat height, depending on your counter) in teak, resin, or metal. Stack napkins, mix ingredients, and keep spirits on the cart itself. When the party’s over, roll it into a shed or corner. Portable setups shine if you rent or like rearranging your space.
Outdoor Refrigeration and Beverage Storage
Warm drinks ruin a good gathering. A dedicated outdoor refrigerator is the single best upgrade for a deck bar. Built-in models mount directly into a counter frame (standard width is 24 inches): under-counter versions sit below for easy access. Expect to pay $800–$2,500 for a decent unit. Look for stainless steel with insulated doors rated for temperature swings, outdoor fridges work differently than kitchen models.
If a full fridge isn’t in the budget, a beverage cooler (50–100 quart capacity) filled with ice works fine and costs $50–$300. Position it near your serving area so guests can grab drinks without raiding the kitchen. Drain holes in coolers must stay clear: place them on a slight slope or use a floor mat with drainage.
For longer-term storage of bottles and spirits, a weatherproof cabinet or lockable deck box keeps inventory organized and protected from sun. Line shelves with waterproof adhesive shelf liner and ensure airflow to prevent mold. Stock basics: beer, a spirit or two, mixers, and plenty of non-alcoholic options.
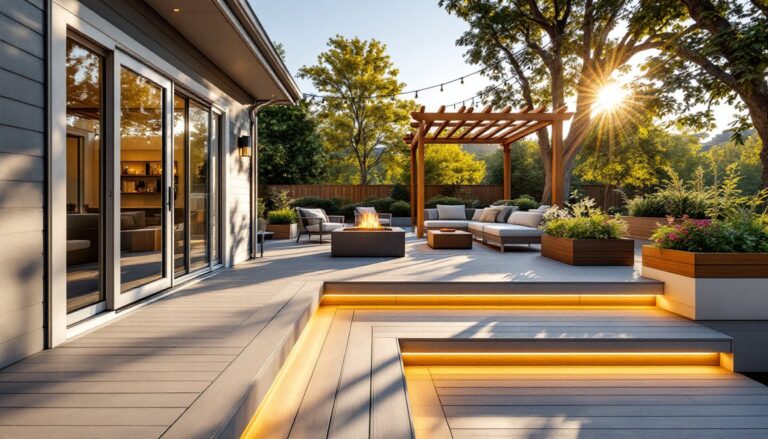
Shade and Shelter Solutions for Comfort
A bar in full sun becomes uncomfortable fast. Shade transforms a deck bar from seasonal fun into a year-round gathering spot. A retractable awning mounts to your deck railing or house and extends when you need it, costs run $400–$1,200 installed. Manual versions are cheaper and work fine: motorized ones are pricey but convenient.
Alternatively, a pergola or shade structure gives permanent coverage with room for vining plants. A simple post-and-beam pergola (8×10 feet) runs $1,000–$3,000 in materials and can be DIY’d if you’re comfortable with fastening bolts to deck framing and setting posts in concrete. Spacing slats about 12–18 inches apart lets some light through while cutting glare and UV.
Patio umbrellas are the quick fix: a 9-foot cantilever umbrella costs $150–$400 and covers most of a bar setup. Anchor it with a weighted base so wind doesn’t tip it. Consider your deck’s sun exposure, east-facing mornings, south-facing all day, west-facing hot afternoons, and position shade accordingly. Resources like Better Homes & Gardens offer comprehensive guides on shade structures and seasonal adjustments.
Lighting and Ambiance Elements
Nighttime entertaining demands good lighting. String lights (Edison bulbs, fairy lights, or modern bistro styles) strung overhead create instant atmosphere for $30–$150. Use weatherproof outdoor-rated fixtures and run them on 120-volt circuits protected by a GFCI outlet (Ground Fault Circuit Interrupter), which shuts off power if water is detected. This is not optional near wet areas.
For task lighting over your bar counter, recessed LED downlights or track lighting let people see what they’re mixing and pouring. Install these before your counter is fully finished, running wiring through framing is easier than retrofit work. Use low-voltage LED systems (12–24 volt) if you’re uncomfortable with 120-volt work: they’re safer and simple to install.
Floor-level accent lighting, solar LED path lights or low-voltage spotlights, highlights the bar area and guides guests safely. Avoid bright white light: warm color temperature (2700K or lower) feels more inviting than harsh daylight equivalent. Dimmers let you adjust ambiance from active entertaining to relaxed evening mode. Coastal designers like those featured in Sunset’s outdoor bar guide emphasize how layered lighting, overhead, task, and accent combined, creates depth and function.
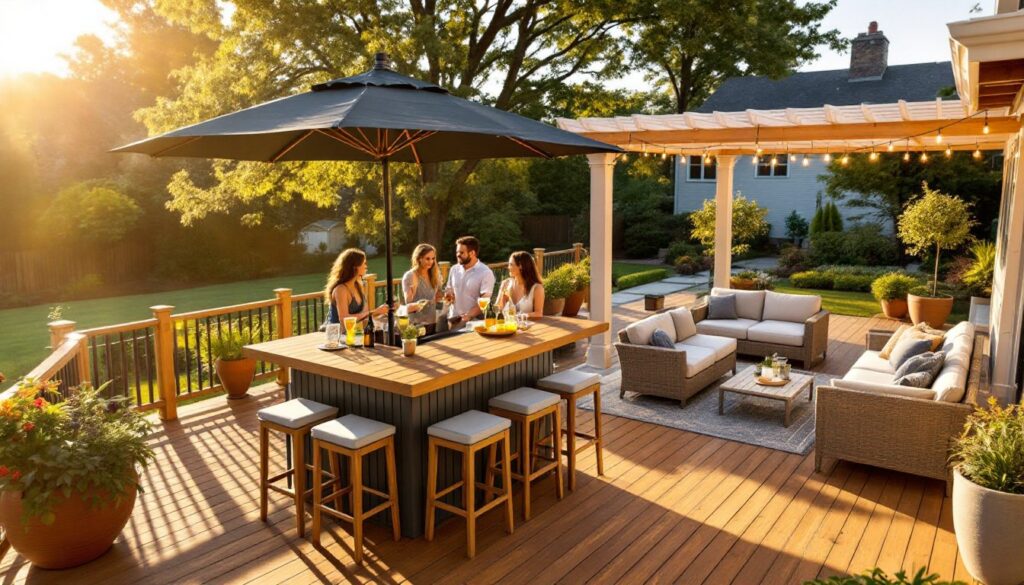
Seating Arrangements and Guest Layouts
Smart seating layout keeps conversations flowing and prevents bottlenecks. If you have a built-in counter, install 3–4 bar stools on one side for the bartender and guests watching drinks being made. Space stools about 26–30 inches apart center-to-center: anything tighter feels cramped. Reserve standing room on the opposite side for mingling.
Beyond the bar itself, arrange lounge seating nearby, a 4-piece sectional set, Adirondack chairs, or a outdoor sofa with weatherproof cushions. Group furniture in conversational clusters (small tables surrounded by chairs) rather than one long row facing the deck edge. This encourages mingling instead of siloing guests.
For small decks (10×12 feet or less), go minimal: two bar stools, a small cart, and maybe one side table. Larger decks (20×16 feet or more) can handle the full setup with dedicated zones, bar on one end, lounge and dining elsewhere. Plan foot traffic flow: the path from house door to bar to bathroom shouldn’t require dodging furniture. Smooth transitions prevent accidents and spills, especially after a few drinks. Gardenista’s outdoor living guides showcase how professional designers balance function with aesthetics in compact and sprawling spaces alike.
Conclusion
Your deck bar doesn’t need to be elaborate or expensive. Start with one idea, a cart, a cooler, and some string lights, and expand from there. Prioritize shade, good lighting, and solid seating: those three elements transform any deck into a welcoming gathering space. Most projects take a weekend or two, and mistakes teach more than perfection. Build gradually, test what works, and adjust. Soon enough, you’ll be the neighbor everyone wants to visit.